
I've been wanting to do pour painting again with the girls ever since
It was so much fun!
It wouldn't be very practical to have a bunch of tiny tall paintings all over the house though.
So, why not have them outside in the garden?
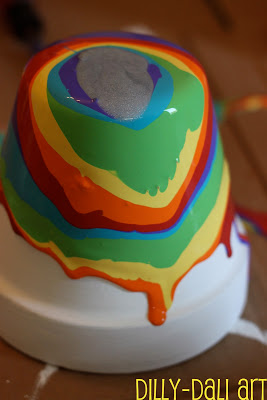
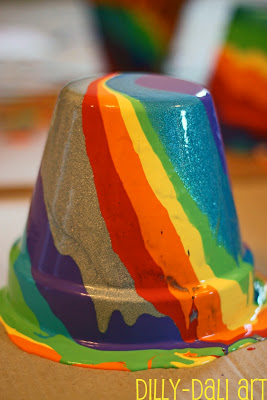
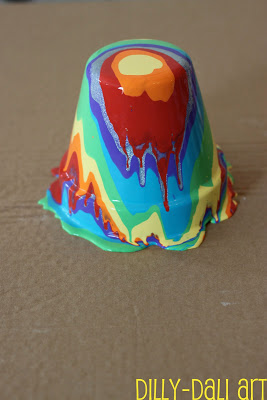
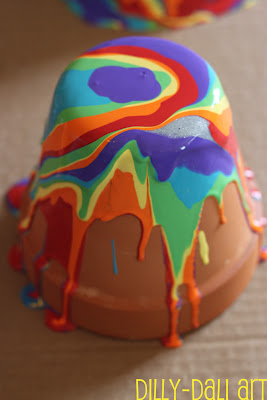
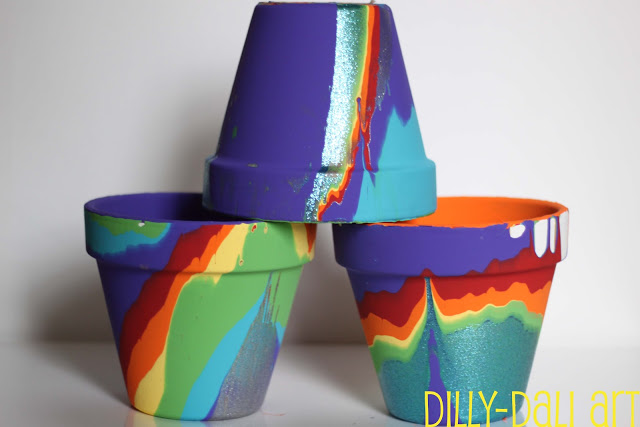
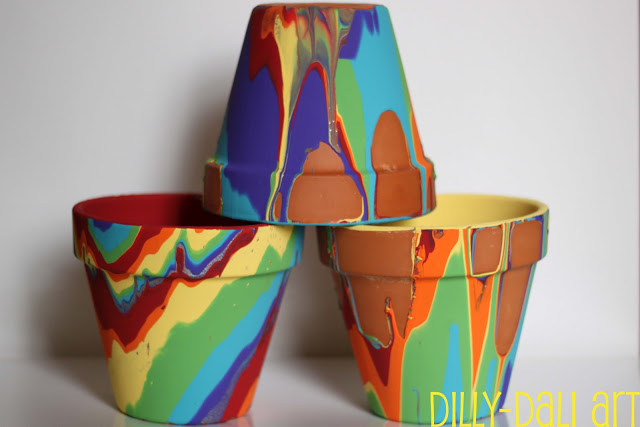
We pour painted on terra cotta pots!
and
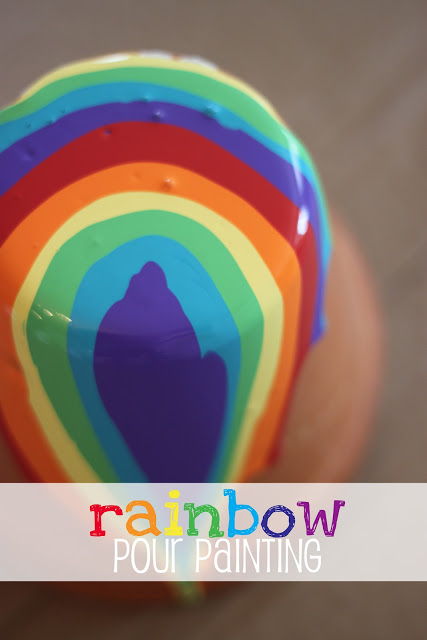
since I love rainbows so much, we used rainbow colors!
(did I mention that this is a rainbow linky party!?!)
We used 6" terra cotta pots and 8oz bottles of acrylic paint.
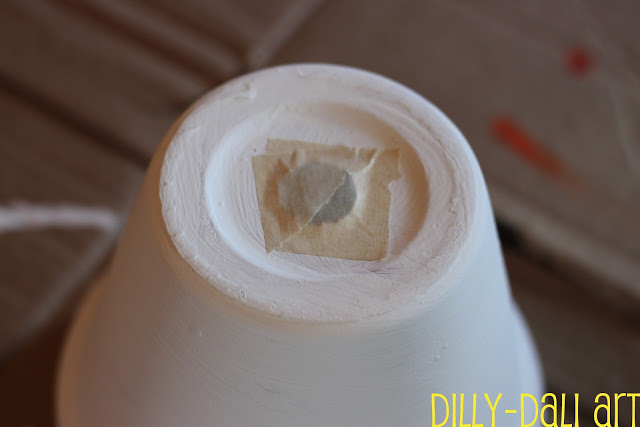
First, I taped up the whole bottom of the pot because
I wasn't sure if the pot would sit steady with paint on the bottom
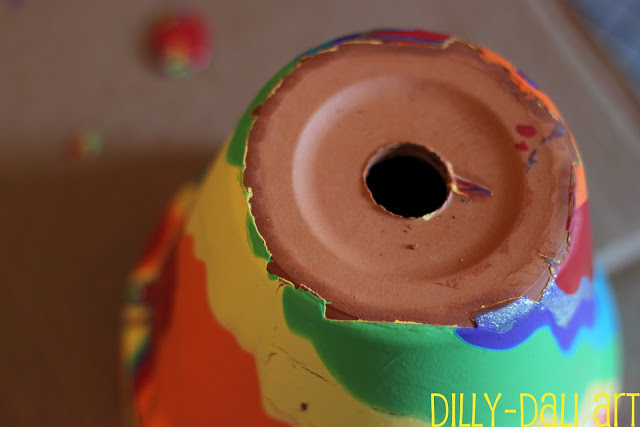
When I pulled up the tape it left a jagged edge around the bottom
so, I just taped over the hole for the rest of the pots.
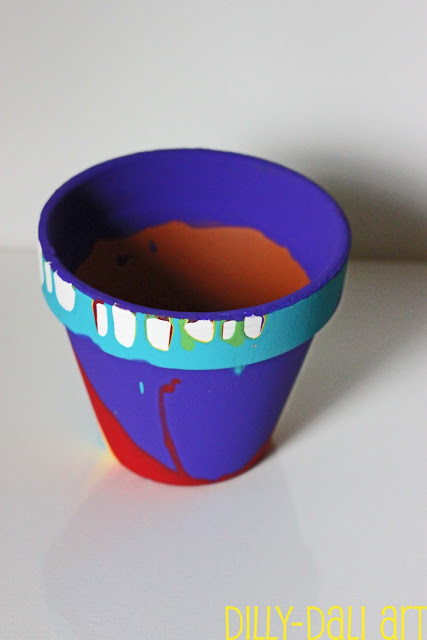
I also painted a couple of the pots white, just because.
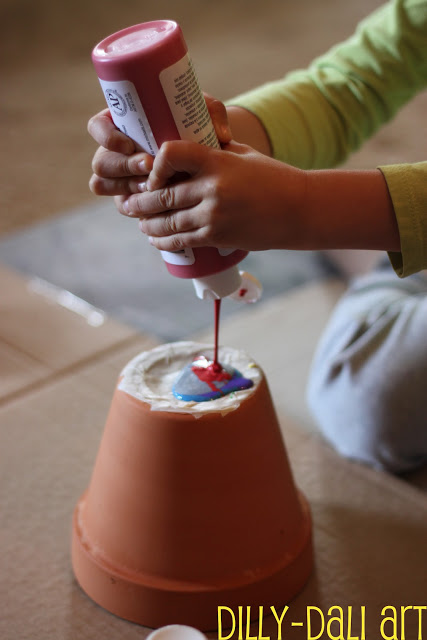
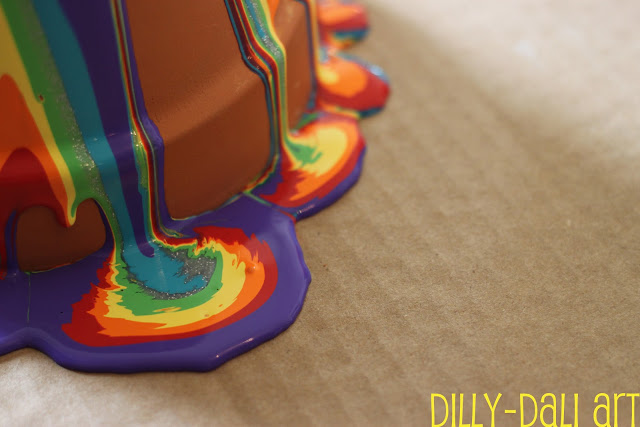
All you have to do is squirt paint on top the pot
directly in the middle.
Keep repeating with the different colors until you have the look you want.
FYI, I've found that less is definitely more with pour painting.
If you use too much paint, you won't get the layers of all the colors down the sides.
When the paint is dry enough and you flip your pots right side up,
you might find that the lip is a little messy looking.
Just paint around the top and the inside to clean it up.
We'll be giving these pots to the special ladies in our lives for Mother's Day.
Now it's time for you to link up your favorite rainbow posts!
Arts, crafts, food, play,
anything
RAINBOWS!
Now it's time for you to link up your favorite rainbow posts!
Arts, crafts, food, play,
anything
RAINBOWS!




This is such a great idea. Now you have beautiful planting pots!
ReplyDeleteThank you Melissa! I think they'd make great catch all pots for having around the house as well :)
DeleteThese are BEAUTIFUL! I absolutely love them. I've been thinking about doing some mosaic decorationon our flower pots but I think this will be much more appealing to my pre-schooler. Thank you for the inspiration!
ReplyDeleteI'm so happy to have inspired you Ness! If you end up pour painting some pots I'd love to see a picture on my FB page!
DeleteWow such beautiful pots! I could do with something like this to brighten up my herb garden.
ReplyDeleteYes! They'd be perfect for an herb garden!
DeleteI saw the video of the artists that did this project. I LOVE your idea and we were planning on making our own pots anyways this year! Thanks for the inspiration!
ReplyDeleteCheers,
Tricia
Awesome Tricia! I hope you do make some, they were so fun. We watched a video on it last year when we first did pour painting, so neat to watch :)
DeleteNow that one fine piece of art! They are beautiful:)
ReplyDeleteThanks for visiting Deborah! I think they're beautiful too :)
DeleteWhat beautiful flower pots! Great idea!
ReplyDeleteThanks Crystal!
DeleteWow, they look amazing. I would never have imagined that would work. Looks like fun to make too.
ReplyDeletelol, I have to admit, I wasn't sure it would work either but so glad it did! They really were fun to make!
Deleteyour pots look incredible. what a great idea
ReplyDeleteThank you!
DeleteWow, these pots are amazing. They are so colorful! Love it!
ReplyDeleteThanks Melanie!
DeleteThis is such a fantastic idea! I love it. And what a great gift idea too!
ReplyDeleteThanks Lyndsay, I really hope the moms we give them to will love them as much as we do
DeleteWOW!!!! You are amazing!!! Pinning this as I want to remember to do this someday.
ReplyDeleteThanks for pinning Rebekah! I'd love to see yours if you do them!
DeleteI LOVE these! Wow, so beautiful and each one different to the next. What a beautiful gift idea!
ReplyDeleteThank you Caz
DeleteBeautiful!! I love this idea! No 2 pots will look the same, yet they all look like they belong together. Definitely filing this idea away as a way to add some more color to our gardening activities. Thanks for sharing :)
ReplyDeleteYou're welcome, I hope you get a chance to try this!
DeleteStunning. Of course :-) I just love them. What a perfect Mother's Day idea.
ReplyDeleteThanks Chrissy :)
DeleteOh my this is soooooo pretty! How very gorgeous. Wonderful how they turned out. I am inspired!
ReplyDeleteMaggy
Thanks Maggy!
Deletethose are STUNNING Alaecia!!
ReplyDeleteThanks so much Anna!
DeleteThese are gorgeous! What a great technique.
ReplyDeleteThanks Trisha, it really is a great technique, so fun!
Deleteif you put multiple layers of newspaper under cut like a christmas tree skirt, then the paint soaked paper could be pulled out without disturbing the drying pot. then you could insert a tall jar under the upside down pot to hold it off the work surface, the paint will just run off. the pot could remain there until dry.
ReplyDeleteThanks Anon! I had originally had the pots on the cardboard because I was planning on keeping the cardboard but ended up not keeping it. Luckily I found that the acrylic dried quite fast and I was able to flip the pots and let them finish drying on a tippy top shelf away from little fingers and a big fluffy puppy!
DeleteWe attempted these yesterday and let them dry overnight! So awesome! I'm not sure who enjoyed it more -- the kids or me! LOL
ReplyDeletehttp://inlieuofpreschool.blogspot.com/
http://www.facebook.com/InLieuofPreschool
Your turned out great Genny, it is a lot of fun isn't it!?
DeleteI NEED to do this! We're creating a fabulous children's garden and these pots will just make it pop! Thanks for sharing. Great post!
ReplyDeleteThese pots would look great in a children's garden! Thanks for visiting Debs
DeleteSuch a fun project - I love this adaptation from the pour painting sculptures. I didn't follow the directions completely, but we still had fun with this project! http://dollarstorecrafts.com/2012/05/tutorial-poured-paint-planter-planting-tips/
ReplyDeleteI'll be trying it again!
LOVE this!!!!
ReplyDeleteI meant to comment on this when you posted it... seriously this is gorgeous and SOOOO COOL! I really really need to try this! Rainbows make me so happy!
ReplyDeleteI can't wait to try this with my boys! What a great idea and who doesn't love rainbows?!
ReplyDeleteI had to copy you those pots just turned out way to cute I did give you credit with a link to your site of course here is a link to the pots my kiddos created http://familylicious.com/pour-painitng/ Thanks so much for the inspiration!
ReplyDeleteAleacia, Hello! I found you through Familylicious.com. I was wondering if you would mind if I put you on my blogroll. I love your fun art approach. Please email me at [email protected] Thanks so much, Lisa SMMARTideas.blogspot.com
ReplyDeleteThis is one of the stupidest things I have ever seen and it is such a waste of paint. Those pots definitely do not look nice at all; so tacky looking.
ReplyDeleteMan, I sure hope you aren't my mom or Mother's Day is gonna be pretty awkward.....
DeleteROFL at your response Aleacia!! I love you. Really, I do.
Deletethis is BEYOND the coolest thing i've ever seen. came over from in lieu of preschool where she did this and sent us here to read the directions! we've really got to do this soon! pinned it and am sharing on FB!
ReplyDeleteI love the look of these pots and I have a bunch of pots just sitting around waiting on a project! I do have one question though ... after you squirt the paint on the pots, do you pick up the pots and move the paint around? Thank you! I am a grandma looking for projects to do with my grandchildren this summer.
ReplyDeleteOnce you add enough paint it will slowly start dripping down the sides by itself, no need to tip the pot :)
DeleteYou inspired us!! We made some beautiful pour painted pots for end-of-the-year teacher gifts thanks to your post!
ReplyDeletehttp://hollysartcorner.blogspot.com/2012/05/craft-project-pour-paint-flower-pots.html
Yours turned out lovely, Holly
DeleteI have been looking for this technique online for two days! I love this!!!!
ReplyDeleteI am nominating you for the "versitile blogger award"...So now, please post about 15 blogs that you love!
ReplyDeleteLisa http://SMMARTideas.blogspot.com
This comment has been removed by a blog administrator.
ReplyDeleteI love the look and followed your exact directions but it did not work at all. I bought acrylic paint but in a squeeze tube and it was too thick to drip. Whe it finally made it to the sides it dropped in big globs and I had to shake it to work. I wanted to make it for a teacher gift but it did not work. What exact paint did you use? I bought mine at Michales?
ReplyDeleteYou definitely want to use paint in a bottle, not tube. We used craft smart paint from Michael's, apple barrel works well also.
DeleteThey look so neat! I've never seen this done before. I've book marked it for a fun project with my daughters.
ReplyDeleteHope you enjoy doing this project with your daughters!
DeleteFound you on Pinterest. Love this idea. Must try!
ReplyDeleteThanks for stopping by!
DeleteJust found this on Pinterest, so I don't know if anyone will even see this comment, lol. What a fantastic idea! I have a shed full of clay pots that could be beautiful painted like this. Don't know if anyone else thought of this...but I would try using the blue painter's tape to cover most of the bottom. That way, when you pull it off it might not leave a jagged edge and your bottom would be smooth. I have used that tape on many other projects-but not yet on clay. It always leaves a smooth line when removed. Plus, you might even be able to use the same piece of tape over and over. I'm going to try that and see if it works better. Thanks so much for this neat idea!
ReplyDeleteI'd love to hear how the painter's tape works out if you try it!
DeleteThis is great! Question, did you seal them after they were dry? I want to do this project with kids at our Parent's Night Out and have to figure in drying time. Thanks
ReplyDeleteWe did not seal the pots only because we do not use ours outside. If you don't seal them I'd suggest using a pot liner
DeleteLove this! Did this with my kiddos last weekend!
ReplyDeletehttp://janetsmith0718.blogspot.com/2013/05/pour-painting.html
I can't figure out what I'm doing wrong with this project. I love the idea but I've tried it three different times now and can't seem to get it right. Grrrr... The colors seem to blend together or overrun each other and it all ends up looking like a blobby mess. Any suggestions? Please?
ReplyDeleteI'm not really sure what you're doing wrong...
Deleteare you using acrylic paints? Are you squirting the paint directly into the center? Are you tilting the pot?
Oh wow!1 this is so beautiful!! I just can't wait to try this out!!
ReplyDeleteThese are absolutely beautiful! Shared your idea in a collection here http://siayla.blogspot.ca/2014/02/got-paint-try-painting-with-out-typical.html
ReplyDeleteThis is too cool! I shared it on my site - I hope that's okay! :)
ReplyDeleteThese are so cool. Did you do something to treat the outside so you can use them outside in rainy Portland OR? and is this done just by letting the paint drip ? NO spinning involved?
ReplyDeleteI didn't coat them with anything for outside use because I use mine inside. All it is is dripping paint! No spinning involved :)
DeleteHello ! I loooooove your rainbow pots ! They're amazing ! I would like to use the same technique with my son, but I was wondering if acrilyc paint was necessary or if we could use gouache. Have you ever tried with gouache ? Thank you (and sorry for my english...) !
ReplyDeletewow, they're splendid ! Thank you for the tutorial.
ReplyDeleteI love these! Thank you for sharing!
ReplyDeleteI want to do this with my Brownies, but mine just aren't turning out like this. The colors mix and get muddy, or don't flow all the way over the pots. I know you say not a lot, but could you give me an idea of how big the drops should be? (I just can't find anything on YouTube) Do you wait for it to start dripping before going to the next color or do you start the next color right away?
Any advise would be so appreciated! Thanks!